Random thoughts on my son, bicycle riding, bicycle racing, mythtv, kayaking, sailing and whatever else I feel like posting.
Thursday, August 9, 2012
Sailing Lake Norman
Going out was a straight shot downwind, then a couple lazy reaches across the bigger part of the bay. Coming in was a fair bit of tacking and I wasn't in a hurry but not super impressed with my tacking angles but really not too bad. All in all a nice relaxing day, except for a stowaway that decided to scamper across my foot partway out. A nice size wolf spider has been living down by the keel apparently. Hopefully he has moved on, really do not want to meet him again.
Tuesday, November 22, 2011
Lake Murray, SC
| A fair bit of heeling even with just the main up |
What took about 3 1/2 hours to get out to, ended up taking the better part of almost 12 hours to get back. The wind had died overnight for the most part and shifted so I was back on a close reach which is no fun in light shifting winds. Only had a small trolling motor but worse I hadn't put back in the larger batteries so I was stuck trying to gather what wind I could and paddling to get somewhere. Ugh. You can see in the track below the straight line out and the much less fun track back. And the glassy conditions at times on the lake in the picture above. Ah well, it was still nice to get out and learned a few more tricks and made it back so all in all a good weekend.
Wednesday, November 9, 2011
Companionway Updates
You can also just see the new drop board bits I built which I'll get pics of later.
Tuesday, October 4, 2011
Sailing on Lake Marion - Day 2
The one long tack from Vance back across the lake looked like this and was the best part of the day. Note the lack of a tiller. I just sat with my back on the cabin occasionally leaning a little left or right to adjust my heading. The engine there became just for show since it wouldn't run after a bit, just started leaking gas. I was guessing that the float in the carb got stuck or some such. I am definitely going back to the trolling motor because it has been nothing but trouble.
I was ghosting my way under the bridge close hauled and just about through the second span when a gust of wind came up and grabbed the front of the boat, smashing the bow. Yay. Got a pretty good bit of damage to a spot that had already been repaired once prior to me, so now I get to repair it again for real. Slightly ironic in that I have a rub rail I am working on that will look nice ad would have been great protection for that but oh well. On the other side of the bridge the winds got flukey which are a real pain to deal with when you are steering by jumping around the boat. I did get a good wind for a while but I started figuring that it was going to be tight making it to the landing by dark and if the wind died I wasn;t going to make it. So I bailed out at a boat ramp with a nice beach next to it. Tied the boat off and got to enjoy a nice 8 mile run back to my car. Well I probably ran about 6 of it and walked 2, took me about an hour and 15 minutes or so. Well I did want to get some exercise this weekend.
All in all, it was quite an adventure. What is it they say, "It's not an adventure until something goes wrong." I was happy that despite all the setbacks the boat did get me back home in one piece and I learned quite a bit about the boat and how to sail it. I'd actually sail Lake Marion again. It was a nice wide lake, the camping was beautiful and there were plenty of spots to camp. The cypress trees are vary nice. I'd launch closer to 95 to avoid the hairy sections and try to generally stick to the south side where the main channel is (the blue line in the google earth pic above) to avoid the hazards.
The rest of my pictures are up on picasaweb at https://picasaweb.google.com/110586701752725030552/LakeMarion
Sailing on Lake Marion - Day 1
So here is a view of the google earth track. Navionics is a great little application (Lakes East is what I have), but I have heard the new version is not as good.
There was a lot of wind, white caps on the lake, but overall not too bad. Probably should not have chosen to launch on the lee shore at a place called Stump Hole Landing though! It lived up to its name with a lot of stumps and in fact the whole lake has good stretches of stumps as well as cypress trees popping up. There was one lonely little tree right out in the middle of the lake. Considered changing my plans to come from the north side of the lake which would have made more sense. But I got out, had a great downwind run making over 4 knots with just the genoa out (the roller furler worked well although I need a longer reefing line!).
I made it under 95 and got greedy and tried to hoist the mainsail. Well the new tiller tamer had been working great except that my tiller moves up and down so when I am not holding it it basically falls down and locks the tiller. So when I moved forward and was pulling the main up a good gust of wind came up, pushed the boat out of the wind and caught the sail. When the boat heeled over, I heard the crack of the rudder. The wind was pushing me hard into the shore for a while until I got things situated.
So I got to to learn how to sail for the next 7 miles by playing with sail trim. I was losing light since I got a late start playing with things around the house, so I decided to hit a nice harbor I saw on the charts and just managed to glide up to a great little island and get everything on the shore and my tent set up in the last bit of light. I had a nice little spot and the Newport floated out in about 8 inches of water. Great sandy spot for my tent, sheltered from the wind and I slept like a baby, except at one point when my forearms got tight (from holding the sheets for two hours steering along) and I woke up with my hand asleep.
But again, got a perfect spot to camp and had a great night.
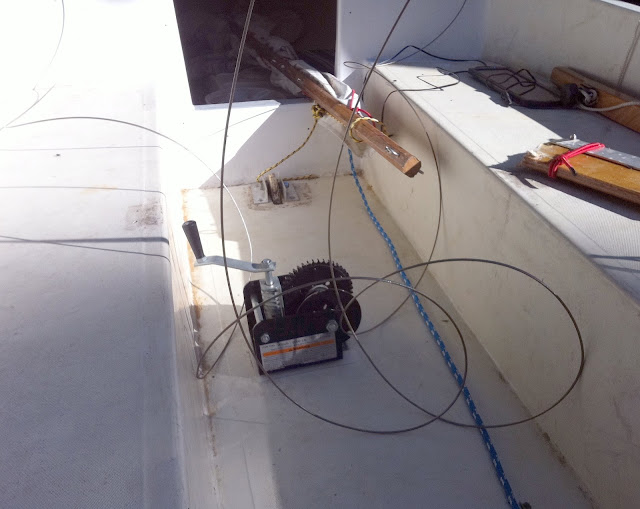
New Gear Winch, Mainsheet Routing, Tiller Tamer and the death of a Rudder
Here you can see where I ran the mainsheet and now run it to the end of the boom. Not entirely happy with it but I wanted to go out this weekend and wanted to get it working. Basically cleat it under the tiller. Please disregard how dirty the cockpit is, still need to clean and paint it.
I also managed to put together a tiller tamer out of part of an old broken desk chair that I saved the wheel adjuster for. I tend to look at something like that and say 'that could be good for something' and in this case it paid off.
However, stay tuned for the next bit where the tiller tamer combined with some good wind gusts and a little bit of stupidity led to this, the remains of my rudder:
Thursday, September 22, 2011
Here is the drum. This is the only part I glued together and even that doesn't absolutely need it. From the bottom it consists of a 1/2 inch cap, small bit of 1/2 pipe to connect, 1/2 male threaded piece, PVC box cap (from electrical dept.) 1/2 inch thread to 1 1/4 adapter, small bit of 1 1/4 to connect it to the next adapter, plate and male adapter, then the 1/2 inch pipe starts.
You can see where the 1/2 pipe starts I actually drilled and chamfered a small stainless (#6 x 1/2) screw rather than gluing. I had done this same design but glued all the pieces together but ended up breaking bits on it while moving the mast around and such. Using a screw does two things; allows me to take it apart and replace bits if needed and makes it slightly more flexible which will hopefully put a little less stress on things and I won't break it! We'll see how it holds up. If it all goes to heck, I can still take the jib off and hank it back on but it has held up rolling things up in about 25mph winds.
Here is the next bit. Basically cut pieces of PVC long enough to go in between the hanks, then cut out a bit of the coupling and pipe about halfway around to give room to get the hank on the fore stay. Then I put a screw in the backside of the coupling (could also be glued). Do this for each hank of course.
And here is the top bit, pretty self explanatory. Using eyebolts with washers, then zip tying the jib top and bottom. The whole thing just spins on the caps on either end, tension on the sail is preset by the zip ties and the pvc pipe between the hanks so you want to get it fairly tight. I also sized it so the caps roll on the swaged ends and not on the stay itself, it will roll smoother and less chance of damaging the stay that way.
Final step, go sailing!
Monday, March 9, 2009
Friday, October 10, 2008

Alright, so here is the cockpit sole getting ready to go back on. You can see I left spaces between some of the plywood cores. My theory being if one of them gets wet and starts to rot at least it won't be all of them.
I dropped it down and used 3M 5200 to seal it back together. Used about 125 3/16" Aluminum rivets and backing washers. Came out pretty well, not pretty to look at but solid.

And here it is looking like an actual boat again! I rigged up a mast taberknackle out of 3/4 plywood and some fiberglass, temporary until I break down and order the right parts from Dwyer Mast. That will push my costs up a good bit. I will put up a post with my cost breakdown soon, but suffice it to say I wasted some money on buying smaller quantities of things like epoxy and fiberglass resin by not breaking down and buying the right amount to begin with. Kind of a learning experience there, I was trying to save money but in the end there were some places I could have saved by spending more up front on supplies.
I did order a main sail from Bacon Sails which I haven't hoisted yet but looks pretty nice in the bag. A lot cleaner than the genoa that I have. At some point I will order a jib from them since that one is pretty rough.
If all goes well I will get it in the water this weekend for a test run. Need to finish hacking together the ruddder I am working on, hack up a boom and sheets, place cleats for said sheets, finish the transom, and get that keel bolted back in there. And don't worry, I will have an outboard for when all of that breaks and the mast falls off.
Obviously more to go before I will be content, mainly paint, rub rail, windows, a real rudder and boom. But making progress.
Tuesday, September 30, 2008
OK, so this is what is left after I removed the whole core from the cockpit deck. I didn't want to do this now, but the best time to do it was now when it was all apart. There was not one piece of good wood on this part, although the sides where the seats are is in good shape, so that's a small blessing. This isn't an expensive job if you do it yourself, but it is a lot of labor.
So I cut out all of the rotten wood and cleaned up the fiberglass. You can see at the top of the picture where I epoxied some aluminum corner channel which will sit at the centerboard trunk and deck junction. It will also give me a good spot to bolt the plates that will hold the centerboard.
Here you can see where I am epoxying some more aluminum around the hole where the cable to lift the keel comes through. I figured it would be stronger and corrode slower than wood at least. The rest of the deck I will core with 1/4 plywood and cover all of this with fiberglass, so we'll see. Hopefully with a good layer of 5200 adhesive caulk joining the centerboard trunk with the deck I won't get these leaks anymore and won't have to worry about it.
So I am making progress, I hope to have the majority of this epoxy work done by this weekend. You can also see I have hull 689, or if you read it upside down, it's hull 689.
Thursday, September 25, 2008

I made some chain plates today. I wanted to do something besides fiberglass and epoxy for a bit, so I figured I would make the sidestay chain plates. These hold the lines that stabilize the mast on the sides for the non-nautical. I had bought a 4 foot piece of 1/8 aluminum corner stock, and just cut them out. A little grinding, a little drilling and some filing to clean it up and there you go. They should be made of stainless steel for the most strength but these should hold up for a while, and working with aluminum is a lot easier than stainless steel.
I wasn't going to spend any time on things like this until after the hull was back together, because if that doesn't go like I plan, what's the point. But I figured these would be very useful to hold the topside when I go to lower it back down on the boat and I already had the metal so why not.

I bought a Newport 16 this weekend. That might be an exageration in that I bought a hull, a mast, an old jib sail, and a trailer really. But what else do you need really? . And the two Icehouse beers in the bilge were just a bonus! OK, no, I did not drink them.
I guess I would say I am new to sailing but used to go out a lot on my grandfather's sunfish up in Michigan every summer, and I have a gaff rigged sail on my kayak I have been playing with lately. But nothing bigger than that. Hoping if this works out it will be a good boat to start with. Big enough for me and a couple others.
The whole seam between the hull and topside (except the transom) was broken and had been siliconed back together. Lots of fun cleaning that out. I built a lift and pulled the top off and am in the process of fixing some bad repairs and damage on the edges.
I have a few more pics here, on photobucket, http://s17.photobucket.com/albums/b75/tschmidty69/Newport%2016/
You can see where I started to prop up the front after separating it. It actually was held together by the silicon caulk but with a ton of gaps of course. I was originally going to just clean it out and try to epoxy it back together, but I decided after poking at it that it needed to just come apart to do the job right. Right now I have the bottom almost ready and need to start on the top. I've put in about 6 hours (including trips to the store) so far.
Suggestions for how to put it back together would be appreciated if anyone has any. My plan is to make sure both mating surfaces are flat. then epoxy and rivets, with washers on the bottom of the rivets. I don't see a huge need to through bolt it, it would be a bit stronger but more money.
Also wouldn't mind some details on rigging. I know boats will vary but curious how others have the blocks laid out, etc.
It really shouldn't be too long until I get it going, but we'll see. If not I have a trailer for my next boat!